HTTP clients make requests to HTTP servers, which generate responses. It is always the client sending the request, and the server responding. WebSockets are a bit different - they allow you to open a 2-way persistent channel between a client and a server, where either client or server can send data down that channel at any time. This allows for exciting applications such as my infinity whiteboard, real-time chat or multiplayer games where data is constantly flowing between clients and a server.
For an example of a simple online multiplayer game built with WebSockets, see https://x.compsci.me (~400 lines of code between server and client).
Once a WebSocket channel has been opened between a client and a server, they can communicate with each other by sending and receiving messages. Both have the ability to send a message and also the ability to listen for new messages arriving. But unlike an HTTP request which receives a response as a direct reply, when a WebSocket message is sent there is no direct reply. Messages are sent and messages are received independently of each other. When you receive a message you can, however, send a message back - but that message back isn't in any way associated with the first message.
Similar to how a button being clicked on a web page generates an event which is listened for, a message being received over WebSockets also generates an event. As with button click events, you handle this event with a function which receives the details of the event, which includes the message being received. Clients need to listen for messages coming from the server, and servers need to listen for events coming from clients.
I've set up the api.compsci.me server to handle WebSocket connections. You're going to make a simple WebSocket client to connect to it.
In a JavaScript file, add the following:
let ws = new WebSocket('wss://api.compsci.me/')

ws.onmessage = (e) => {
  console.log('message received:', e.data)
}
Run the file with Bun. The server has been set up to send you a message as soon as you connect, which should start with 'Welcome! ...'. You'll see this message because the above code is listening for message events on the connected socket and logging them to the console. Wait a few more seconds and you'll see that every 10s the server sends you another message reminding you that life is short. Close the persistent connection by exiting your script with CTRL+C
As well as receiving messages from the server, a client can also send messages:
let ws = new WebSocket('wss://api.compsci.me/')

ws.onmessage = (e) => {
  console.log('message received:', e.data)
}

ws.onopen = () => {
  ws.send('hello?')
  console.log('message sent')
}
... we have to wait for the WebSocket connection to open before we can send messages, but once open we use ws.send('your message'). Run the above code with Bun and you'll see that the server is set up to echo any messages you send it back to you. I said earlier that messages don't receive direct responses, and that's correct: notice that we send the message in one place in our client, and handle messages received back in another. It's not like using fetch() and getting a return value back with a response. This indirection can easily cause confusion.
Open the console in developer tools on this page. Then paste into the console the same code above. You'll see the same messages appear as when you ran it with Bun - WebSockets is a web API available for you to use on your website.
With the connection to the server open, you can dynamically send messages with ws.send() - try it in your console with eg ws.send('hi').
Often you want to send more structured data than just a single string of text. For example, in a chat program you might want to send someone's name as well as their message. As with HTTP requests, we can send JSON over WebSocket connections too.
Let's change the message we send to be in JSON:
let ws = new WebSocket('wss://api.compsci.me/')

ws.onmessage = (e) => {
  console.log('message received:', e.data)
}

ws.onopen = () => {
  ws.send(JSON.stringify({
    type: 'chat',
    name: 'Bob',
    message: 'This is my message'
  }))
}
... note how we need to call JSON.stringify() on the object we're sending, to turn it into a string.
The server has been set up so if it receives JSON messages with a property type: 'chat' then it sends a message to all other connected clients with the JSON data it received. Test this by running the above script in 2+ terminals or browser tabs.
We're going to modify the function that handles messages being received so that it deals with those messages:
// ...
ws.onmessage = (e) => {
  console.log('message received:', e.data)
  try {
    let data = JSON.parse(e.data)
    if (data.type === 'chat') {
      console.log(`${data.name} says "${data.message}"`)
    }
  } catch {}
}
Note the try {} catch {} blocks which are needed because JSON.parse() will throw an error if the data its parsing isn't valid JSON. We need to JSON.parse() to convert the JSON string we receive into a full JavaScript object. If you run the code for long enough, hopefully someone else in the class will send a polite message to the chat. Alternatively, run the code in 2+ terminals/web browsers to send messages between clients.
Tip: You might want to remove the line console.log('message received:', e.data) so that you only handle JSON messages, and ignore messages like the one that gets sent every 10s.
We're going to make a simple chat page that uses api.compsci.me's WebSocket server. Put this code in an .html file and run it with Bun or Vite:
<!doctype html>
<title>Chat</title>
<style>pre { background: #eee; width: 500px; padding: 10px; overflow-y: scroll; height: 200px; white-space: pre-wrap; overflow-wrap: break-word; }</style>
<h1>Chat</h1>
<pre id="messages">The chat begins...</pre>
<form id="theForm">
  <label>Your message: <input id="message" autocomplete="off"></label>
  <button>Send</button>
  <br><br><label>Your name: <input id="yourName" value="Anonymous coward"></label>
</form>
<script>
let ws = new WebSocket('wss://api.compsci.me/')

message.focus()
yourName.value = `Anonymous ${Math.round(Math.random() * 1000)}`

ws.onmessage = (e) => {
  console.log('message received', e.data)
  try {
    let data = JSON.parse(e.data)
    if (data.type === 'chat') showMessage(data.message, data.name)
  } catch {}
}

theForm.onsubmit = (e) => {
  e.preventDefault()
  if (!(yourName.value && message.value)) {
    alert('Name or message missing')
  } else {
    ws.send(JSON.stringify({
      type: 'chat',
      name: yourName.value,
      message: message.value
    }))
    showMessage(message.value)
    message.value = ''
    message.focus()
  }
}

function showMessage (message, name = 'You') {
  messages.innerText += `\n${name}: "${message}"`
  messages.scrollTop = messages.scrollHeight
}
</script>
... then open it in your browser and start chatting. If anyone else is using it at the same time, you'll see their messages in the chat. If no one else is using it, maybe open the same page in another tab so you can chat with yourself between the tabs.
Let's go through the code, starting with the HTML and CSS:
<!doctype html>
<title>Chat</title>
<style>pre { background: #eee; width: 500px; padding: 10px; overflow-y: scroll; height: 200px; overflow-wrap: break-word; }</style>
<h1>Chat</h1>
<pre id="messages">The chat begins...</pre>
<form id="theForm">
  <label>Your message: <input id="message" autocomplete="off"></label>
  <button>Send</button>
  <br><br><label>Your name: <input id="yourName" value="Anonymous coward"></label>
</form>
You may not have used a <pre> element before, but it has some default settings for unformatted text, some of which are being over-ridden with CSS like white-space: pre-wrap; and overflow-wrap: break-word;. You may not have used a <form> element before either - we'll be learning more about those and other form elements in later lessons. The main reason I'm using a <form> though is so when you press 'Enter' or click the button it will send the message.
On to the JavaScript. message.focus() means when the page loads, focus is placed inside the element with ID 'message' - that is, the input box you write your message in. This is a handy little usability feature to save the user having to click into the input box first. Note that this is also called after sending a message, to put the focus back in for another message.
Most of the other code you've seen before or should be able to work out, but there's a couple of things to note about the showMessage() function:
function showMessage (message, name = 'You') {
  messages.innerText += `\n${name}: "${message}"`
  messages.scrollTop = messages.scrollHeight
}
Note that we set messages.innerText rather than messages.innerHTML. This is to avoid an XSS that could occur if we let another user (ie someone you're chatting with) add HTML to your page. By using innerText if they try to add HTML tags, we just show those tags as text rather than parsing them.
If you chat for a while, you'll notice that the box the messages go into is a fixed height with a vertical scrollbar. If we didn't do messages.scrollTop = messages.scrollHeight then the user would have to manually move the scrollbar down to see the newest messages, which is far from ideal.
Having one big global chat may be a bit distracting. For this reason, you can optionally change your code to limit messages received to just a certain room. Just change the line which creates the WebSocket connection:
// before: for the 'global chat'
let ws = new WebSocket('wss://api.compsci.me/')

// after: to be in a room
let room = 'whatever'
let ws = new WebSocket(`wss://api.compsci.me/room/${room}`)
The server is set up so:
if you're in a room
if you're in the global chat (ie not in a room)
... I've set it up this way so I can spy on all your messages if I need to! If you want a more private chat, you'll need to set up your own WebSocket server (covered in the next guide).
We're going to finish off with a CLI chat client to watch what's happening in all the chats. Yes... this is mostly for me to spy on you.
let ws = new WebSocket('wss://api.compsci.me/')

ws.onmessage = (e) => {
  try {
    let data = JSON.parse(e.data)
    if (data.type === 'chat') console.log(`${data.name}: ${data.message}`)
  } catch {}
}
... run this file with Bun to watch all the chats.
You may choose to do this individually or in pairs.
Your task is to implement an online multiplayer game/app using websockets and the api.compsci.me server. Try to keep it simple to get the basics working. There are limits to what you can implement with the server at api.compsci.me which just forwards messages you send it to other clients in the same room.
To ensure you only receive messages for your game and not everyone else's, use a room eg let ws = new WebSocket('wss://api.compsci.me/room/mrgordon-crosses').
Ensure all messages you send are JSON.stringify()'d, and when you receive them you JSON.parse() them.
Here are some game/app suggestions and implementation tips:
2 (or more?!) players take turns choosing 1, 2 or 3 numbers. Whoever hits 15 loses.
The message sent to the server might be the chosen number of numbers (1, 2 or 3) or the actual numbers they resolve to (eg [11, 12]).
Each player sees a <canvas> and can draw on it in their own random colour. They also see everyone else's drawings in real-time.
Suggested implementation order:
<canvas> on an HTML pagepointermovehsl() and randomising the (h)ue)pointermove send JSON to server with colour and coordinatesSuggested implementation order:
For the 3x3 grid, you may want to start with this:
<style>
td { border: 1px black solid; width: 50px; height: 50px; cursor: pointer; text-align: center; }
td:hover { background: #eee; }
</style>
<table>
  <tr>
    <td data-cell="0"></td>
    <td data-cell="1"></td>
    <td data-cell="2"></td>
  </tr>
  <tr>
    <td data-cell="3"></td>
    ...
  </tr>
</table>
And some JS to handle clicks for the cells and tell which cell was clicked:
document.querySelectorAll('td').forEach(el => {
  el.onclick = () => {
    let cell = el.dataset.cell // cell index from 0
    // ... TODO: your code here
  }
})
and some JS to set the value in a particular cell:
let cell = 5 // 0 to 9
document.querySelector(`td[data-cell="${cell}"]`).innerText = 'X'
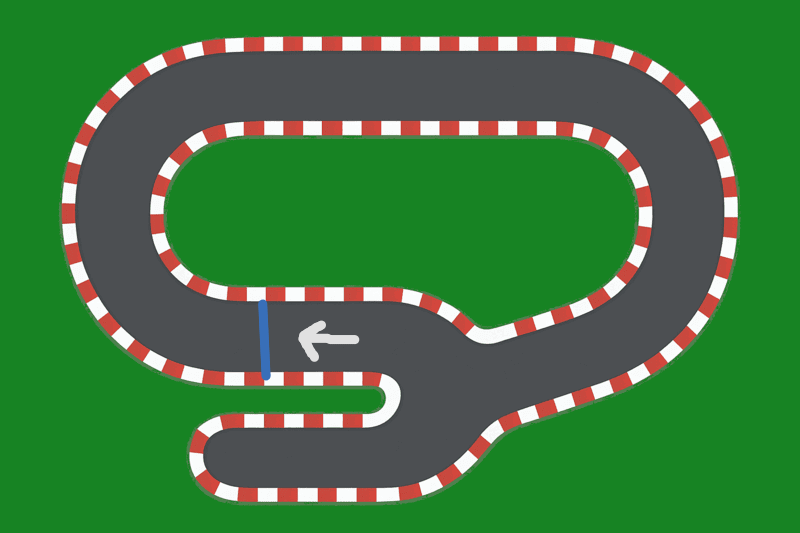
Players control cars around a top-down track. Each completed lap scores a point.
You can use collision detection with a background image combined with this simple 800x533px racetrack image.
I suggest sending a player's coordinates and current number of laps via the WebSocket.